What to Know Before Painting Your Home: A Complete Preparation Guide
Surface prep, paint quantity calculations, brush vs roller, drying times, and how to decide between DIY and professional painting — everything you need before the first coat goes on.
What to Know Before Painting Your Home: A Complete Preparation Guide
Most painting projects that go wrong do not fail during the painting itself — they fail in the preparation phase, or in decisions made before a brush is even picked up. Choosing the wrong color, underestimating paint quantity, skipping primer, or applying a second coat too soon are all avoidable errors that result in wasted time and money.
This guide covers every stage of preparation: surface readiness, quantity calculation, tool selection, application technique, and the decision of whether to hire a professional. It also explains why getting your RAL code confirmed before visiting a supplier is the most underrated step in the entire process.
Stage 1: Surface Preparation
The quality of the finished paint job is almost entirely determined by the quality of the surface before any paint is applied. Professional painters spend the majority of their time on preparation, not application.
Cleaning
All surfaces must be clean and free of dust, grease, and mold before painting. In kitchens and bathrooms, grease buildup on walls is common and invisible until paint is applied over it — causing adhesion failure and uneven sheen. Wash these surfaces with a sugar soap solution and allow them to dry completely.
In areas where mold has been present, treat the surface with a fungicidal wash before priming. Painting over mold with standard paint is a temporary fix at best; the mold will return through the new coat within months.
Filling and Sanding
Cracks, holes, and surface imperfections must be filled before painting. Use a filler appropriate to the substrate: lightweight filler for small imperfections in plasterboard, flexible filler for movement cracks at wall-ceiling junctions, and exterior-grade filler for any outdoor surfaces.
Once the filler is dry (check the manufacturer's drying time — do not rush this), sand it flush with the surrounding surface using medium-grit sandpaper (120 grit is a good starting point), then finish with fine grit (180-220) for a smooth result. Any filled area that is not sanded flush will be visible through the finished paint, particularly in raking light.
Priming
Primer serves two functions: it seals the surface to prevent uneven absorption, and it provides a bonding layer that helps the topcoat adhere. Skipping primer is the most common preparation mistake in DIY projects.
When is primer essential?
- New plaster: must be primed with a mist coat (watered-down emulsion or dedicated new-plaster primer) before any topcoat
- Bare timber: requires wood primer to seal the grain and prevent tannin bleed
- Previously unpainted metal: requires metal primer to prevent rust
- After filling: filled areas absorb paint differently from the surrounding surface, causing flashing (patches of different sheen). A primer coat over filled areas prevents this.
- Dramatic color changes: going from a deep color to a light one (or vice versa) will require more topcoat coats without a primer that neutralizes the existing color
Stage 2: Paint Quantity Calculation
Underestimating paint quantity leads to a second trip to the supplier mid-job — and if the paint was mixed to a custom RAL specification, the second batch may not match perfectly. Overestimating leads to unnecessary expense. Calculate accurately before purchasing.
The Basic Formula
Area to paint (m²) ÷ Coverage rate (m²/L) = Litres required per coat
Then multiply by the number of coats you plan to apply.
Coverage rates vary by product type:
| Paint Type | Typical Coverage | |---|---| | Standard emulsion (interior) | 10–12 m²/L | | Premium emulsion (interior) | 12–14 m²/L | | Exterior masonry paint | 8–10 m²/L | | Gloss / satinwood (woodwork) | 14–16 m²/L | | Primer / undercoat | 10–12 m²/L |
Calculating Wall Area
For a standard rectangular room:
- Measure the perimeter (sum of all wall lengths) and multiply by the ceiling height
- Subtract the area of windows and doors (a standard door is approximately 2 m², a standard window 1.5 m²)
- Add 10% for waste and overage
Example: A room 4m x 3.5m with 2.5m ceilings, one door, one window
- Perimeter: (4 + 3.5) x 2 = 15m
- Wall area: 15 x 2.5 = 37.5 m²
- Subtract openings: 37.5 - 2 - 1.5 = 34 m²
- Add 10%: 34 x 1.1 = 37.4 m²
- At 12 m²/L, two coats: (37.4 ÷ 12) x 2 = 6.2 litres
For a custom RAL color mixed by a supplier, order a little more than you need. Keeping 10–15% in reserve for touch-ups later (when the original batch is unavailable) is standard practice on professional projects.
Stage 3: Brush vs Roller — Choosing the Right Tool
The choice between brush, roller, and sprayer affects both the efficiency of application and the quality of the finish.
Brushes
Best for: cutting in at edges and corners, painting woodwork (door frames, skirting boards, window frames), small areas and detail work.
A good quality synthetic bristle brush (nylon/polyester blend) works well with water-based paints. Natural bristle brushes are for oil-based paints only. For cutting in at wall-ceiling junctions, a 50mm angled sash brush gives the best control.
Rollers
Best for: large flat surfaces — walls and ceilings.
The roller sleeve pile depth matters:
- Short pile (4–6mm): For smooth plaster surfaces. Produces a fine, even finish with minimal texture.
- Medium pile (9–12mm): For general-purpose use on slightly textured surfaces.
- Long pile (15–18mm+): For heavily textured or rough surfaces like exterior masonry.
Use a microfibre sleeve for water-based paints — it holds more paint, releases it evenly, and is easier to clean. Foam rollers produce a smooth finish but are prone to leaving bubbles with thicker paints.
Paint Sprayers
For most DIY projects, sprayers are unnecessary. They require careful masking of all surfaces not being painted, and achieving an even finish takes practice. They are most useful for large exterior projects, furniture finishing, or situations where roller texture is unacceptable.
Stage 4: Number of Coats and Drying Times
One of the most common mistakes in DIY painting is applying a second coat before the first is properly dry. The result is lifting, streaking, or an uneven finish that requires sanding back and starting over.
Drying vs. Recoat Time
These are different things. "Touch dry" (usually 1–2 hours for water-based emulsions) means the surface will not transfer paint to a finger. "Recoat time" (typically 4–6 hours for emulsions, longer for oil-based products) is when it is safe to apply the next coat without risk of damage.
Always follow the manufacturer's recoat time, not the touch-dry time.
How Many Coats?
- New plaster over primer/mist coat: 2 coats of topcoat
- Repainting same or similar color: 2 coats in most cases; premium paints may achieve coverage in 1
- Major color change (light to dark or dark to light): 2–3 coats; a tinted primer saves coats
- Woodwork (gloss or satinwood): 2 coats over primer/undercoat is standard
General coat sequence for new or repainted walls:
- Mist coat or primer (if required)
- First topcoat — apply evenly, do not try to achieve full coverage in one pass
- Light sanding with fine grit (240) once fully dry — removes nibs and dust
- Second topcoat — full coverage, consistent sheen
Stage 5: DIY vs. Professional Painter
The decision to paint yourself or hire a professional depends on the scope of work, your available time, and your tolerance for imperfect results.
When DIY Makes Sense
- Single rooms with standard walls and ceilings
- Repainting in a similar or identical color (minimal preparation required)
- When time is flexible and the process is enjoyable
- For maintenance painting of previously well-prepared surfaces
When to Hire a Professional
- Large-scale projects (whole house, multiple rooms)
- New build or recently plastered surfaces (preparation skills matter greatly)
- High-spec finishes where visible brush marks or roller texture are unacceptable
- Exterior work at height
- When you need the work completed within a tight timeframe
- If there is existing damage (blown plaster, damp patches, structural cracks) that needs expert assessment before painting
A note on getting quotes: If you are hiring a painter, specify your RAL color code when requesting quotes — not a brand name or description. This allows the painter to source the correct paint regardless of which supplier they use, and eliminates ambiguity about exactly which color you expect to see on the walls.
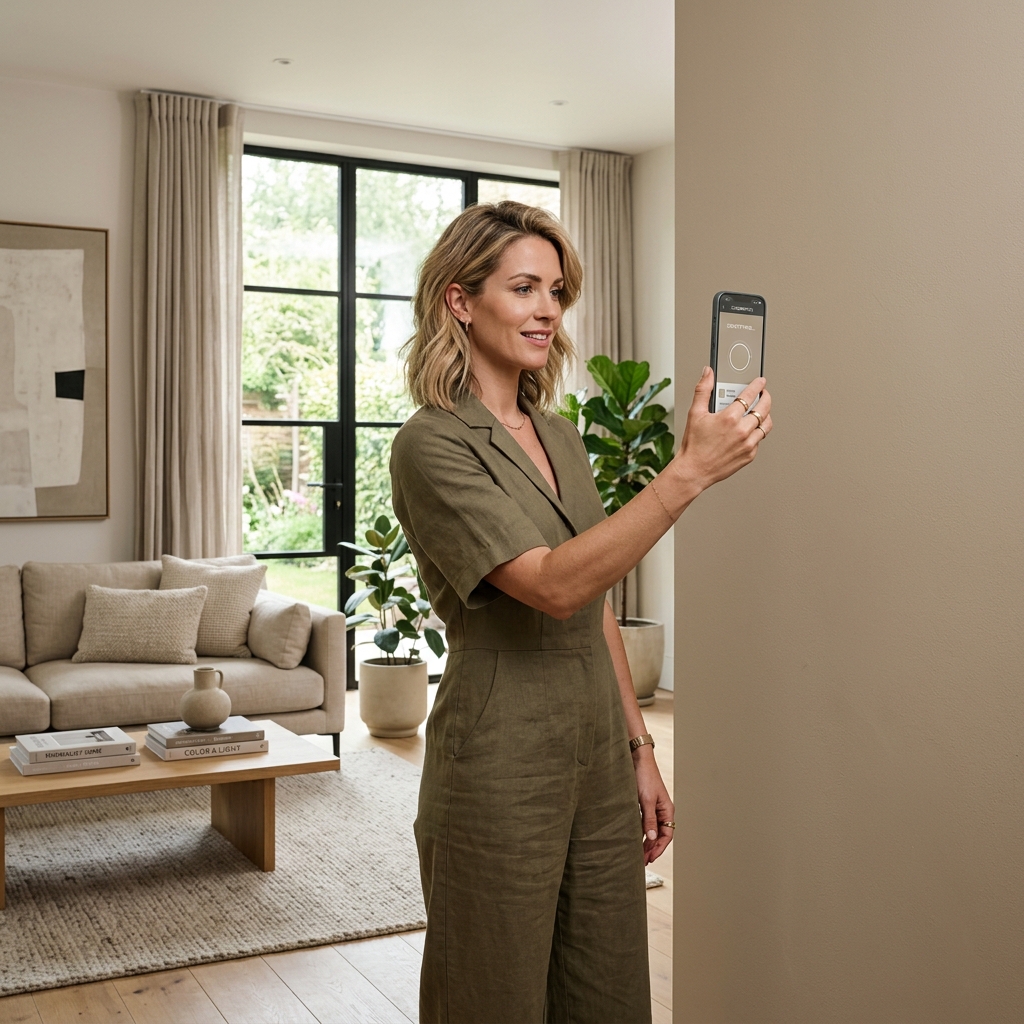
Why Confirming Your RAL Code Before Going to the Supplier Matters
Custom colors are mixed to order. Once the mixing formula is set and the paint is produced, returning it for a color correction is not straightforward — most suppliers will not accept returns on custom-mixed paint. Arriving with the correct RAL code eliminates this risk entirely.
If you are working from an inspiration image — a photo you took, a design you saved, or a reference image from a showroom — WhtColor extracts the precise HEX, RGB, and RAL code from that image. There is no guesswork, no approximate matching under fluorescent store lighting, and no expensive repainting when the mixed color does not match your expectation.
Visit whtcolor.com, upload your image, and get the exact code before the first trip to the supplier.
Pre-Painting Checklist
Before you open the first tin, confirm the following:
- [ ] Surfaces are clean, dry, and free of mold or grease
- [ ] Cracks and holes are filled and sanded flush
- [ ] Primer has been applied where required and is fully dry
- [ ] Paint quantity has been calculated and ordered with 10% overage
- [ ] The correct RAL code has been confirmed and supplied to the mixer
- [ ] Tools are prepared: correct roller pile depth, brushes for cutting in, trays and liners
- [ ] Adequate ventilation is in place
- [ ] Masking tape is applied to all trim, frames, and surfaces not being painted
- [ ] Recoat times are known and scheduled into the timeline
Get Your RAL Code Right Before You Go to the Supplier
Upload any inspiration image to WhtColor and identify the exact color code — HEX, RGB, and RAL — in seconds. Avoid costly mixing errors.
Find Your RAL Code